In business settings, clean windows create professional first impressions and increase customer confidence. At home, they allow you to enjoy your surroundings and let in more natural light, boosting your mood and energy levels. Yet, so many people continue to make some common window cleaning mistakes that undermine their efforts.
Whether you’re a homeowner grabbing a spray bottle and paper towels or a business owner instructing staff to wipe down display windows quickly, chances are some key steps are being skipped.
These oversights can result in cloudy glass, premature wear, and unnecessary replacement costs.
In this post, we’ll discuss how to clean your windows properly and shine a light on the seven most popular window cleaning mistakes.
More importantly, we’ll show you how to avoid them.
So, whether you’re a do-it-yourself enthusiast or someone who prefers to leave it to the pros, this article will help you ensure every window sparkles just like it should, and explain why professional window cleaning is worth it.

Cleaning Windows: Understanding the Basics
Cleaning windows is more than just a chore—it’s a key part of keeping your home bright, healthy, and inviting.
Clean windows let in more natural light, boost your home’s curb appeal, and help maintain the integrity of your glass surfaces.
Yet, despite its importance, window cleaning is often overlooked or done incorrectly, leading to common window cleaning mistakes like streaks, stubborn dirt, and even damage to the glass surface.
The cleaning process doesn’t have to be complicated. With the right tools and a few expert window cleaning tips, you can achieve streak-free windows every time.
Start by gathering essentials like a microfiber cloth or soft brush to remove dust and dirt from the window’s surface. For a homemade window cleaning solution, simply mix equal parts water and white vinegar in a spray bottle—this cleaner is tough on grime but gentle enough to leave your glass sparkling without residue.
Professional window cleaners such as Clearview Services recommend using a squeegee with a rubber blade to remove excess water and prevent streaks for a spotless finish.
When washing windows, steer clear of paper towels, as they tend to leave lint and streaks behind. Instead, opt for a microfiber cloth or a lint-free cloth to wipe and buff the glass.
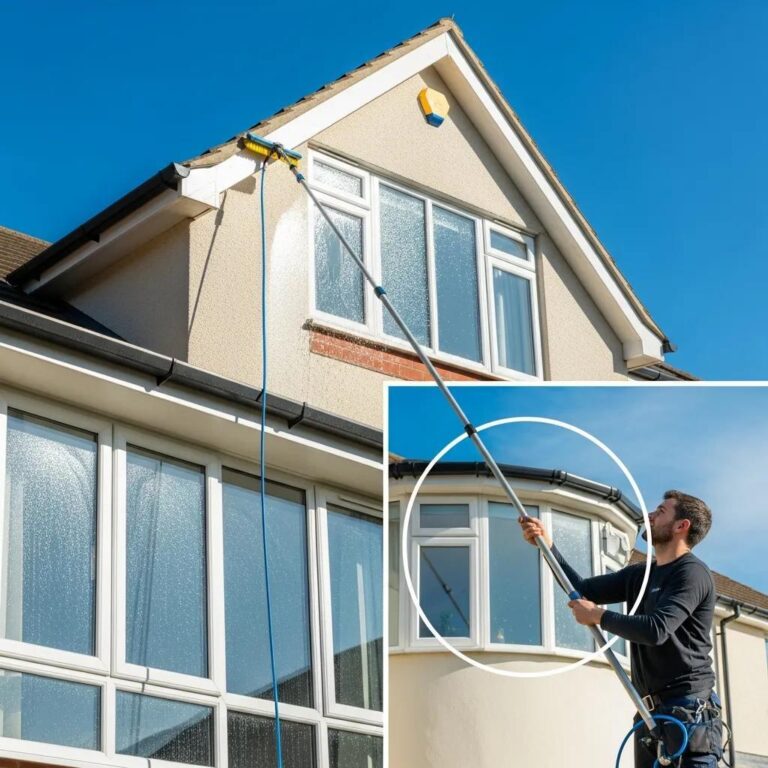
For larger windows or hard-to-reach spots, a telescopic pole with a soft brush or microfiber cloth attachment makes the job easier and more effective.
Regularly cleaning your windows not only keeps them looking their best but also prevents dirt and grime from building up, making each cleaning process quicker and more efficient.
By following these window cleaning tips and avoiding common mistakes, you’ll enjoy streak-free, crystal-clear windows and a healthier home environment.
Whether you’re tackling the job yourself or considering professional window cleaners, this comprehensive guide will equip you with everything you need to clean your windows the right way.
Up next, we’ll dive into the most common window cleaning mistakes and how to avoid them for a flawless, streak-free finish every time.
Avoiding Window Cleaning Mistakes: How to Clean Windows the Right Way
Proper window cleaning isn’t just about removing visible dirt; it’s about extending the life of your windows, preserving their clarity, and avoiding costly repairs.
One of the biggest mistakes people make is skipping the crucial step of removing dust before cleaning.
Always start by removing dust with a dry microfiber cloth, brush, or vacuum, and follow up with a damp cloth to pre-clean the window’s surface. This helps prevent scratches and ensures you don’t just move dirt around.
When it comes to cleaning solutions, you can use a homemade mix of Dawn dish soap and warm water, or opt for a commercial cleaner for especially dirty windows.
The surface tension of your cleaning solution affects how well it spreads and helps avoid streaks during wiping and squeegee use. Be sure to apply enough cleaner to cover the entire surface of the window to remove all the dirt and grime.
For tools, always use squeegees for streak-free results and a microfibre cloth for cleaning and buffing. Avoid abrasive materials like steel wool or scouring pads, as these can scratch the window glass. Using the wrong tools can damage both the glass and the frames.
When cleaning, focus on smaller sections rather than a large area at once—it makes sense for better results and to avoid drying issues.
Don’t forget to wash the frames and sills, not just the glass, to prevent dirt buildup and mold. After cleaning, use proper wiping techniques to avoid streaks and ensure no residue is left on the window’s surface. Dry windows thoroughly with a microfibre cloth or paper towel to prevent water spots and lint.
If you’re using squeegees, manage excess water to keep it from dripping onto the floor. For a quick refresh, window washing can be done, but for a spotless finish on window glass, thorough cleaning is essential. Remember, using the right tools and techniques is key to a job well done.
Step 1: Pick the Right Day
It may be tempting to tackle the task on a sunny day when you can easily see what you’re doing. However, direct sunlight causes cleaning solutions to dry too quickly, leaving behind hard-to-remove streaks and residue.
Pro Tip: On breezy or shaded days, your cleaner will stay wetter longer, giving you more time to achieve a streak-free finish.
Step 2: Gather the Right Tools
The right equipment will determine the outcome. Here’s a checklist:
- A bucket filled with warm (not hot) water
- High-quality squeegees with rubber blades
- Several microfiber cloths or microfibre cloths
- A small amount of mild dish soap or a specialized window cleaner
- A soft brush or hand-held duster
- A sturdy ladder or an extension pole for hard-to-reach areas
- A scraper or razor blade for tough grime (be cautious)
- Optional: distilled white vinegar for a natural cleaner
Note: Avoid using abrasive materials such as steel wool or scouring pads, as they can scratch glass surfaces. Also, do not use the wrong tools like newspapers or rough sponges, which can leave streaks or damage your windows.
Step 3: Dust First
Removing dust is a crucial part of the process and should never be skipped. The biggest mistake people make is skipping the dusting step, which only moves dirt around instead of removing it. Dusting prevents abrasive particles from scratching the glass once moisture is applied. Use a dry microfiber cloth, soft brush, damp cloth, or even a vacuum with a nozzle attachment to remove loose debris from the window frames, sills, and tracks.
Pro Tip: Pay special attention to the upper parts of the window where cobwebs and dust often accumulate unnoticed.
Step 4: Apply Cleaning Solution
You can use a commercial cleaner for tough jobs or a DIY version. For an effective homemade solution, mix one part distilled white vinegar with one part distilled water and a small squirt of dish soap in warm water. Vinegar cuts through grime and grease, while the dish soap helps lift dirt, and using warm water helps dissolve residue for better results.
Use a clean sponge or microfiber cloth to apply the solution, making sure to cover the entire surface of the pane. Apply enough solution to remove all the dirt and grime. Don’t oversaturate, as this can cause excess dripping and water spots. The surface tension of your cleaning solution can also affect streaking, so ensure your mixture is well balanced for smooth squeegee operation.
Step 5: Use a Squeegee or Cloth to Wipe Clean
Starting at the top corner of the glass, pull the squeegee across the window’s surface in a straight line, wiping the blade clean with a cloth after each pass to avoid streaks. Continue working down the window with overlapping strokes, making sure not to leave any residue on the window’s surface.
If you don’t have a squeegee, a microfiber cloth can work—just be sure to use a buffing motion and change cloths once one becomes damp. For the final step, use a dry cloth to buff the window and ensure a streak-free finish.
Avoid circular motions, as they tend to leave swirls or streaks. Proper wiping technique is key to avoiding streaks and achieving spotless results.
Step 6: Buff and Dry
Once you’ve removed most of the moisture, go over the edges and corners with a dry microfiber cloth to absorb any remaining drips or smears. The goal is to achieve dry windows for a polished, streak-free look.
Pro Tip: Use a separate, ultra-dry microfiber cloth specifically for this final buffing to ensure a crystal-clear finish.
Step 7: Clean the Screens
Screens trap dust, pollen, and grime, and those can be transferred back onto clean windows. If your windows have screens, remove them and wash them separately. Rinse with soapy water, gently scrub with a soft brush, and let them dry completely before reinstalling. While cleaning, be sure to also wipe down the frames around the screens to prevent dirt buildup. Place a towel or protective covering on the floor beneath the work area to catch any water runoff and avoid extra mess.
Prefer not to tackle it yourself? Call in the professionals. Clearview is Kent Trusted Window Cleaner. As experts in residential and commercial window cleaning, we’ll get the job done for you.
7 Common Window Cleaning Mistakes and How to Avoid Them
Many homeowners and businesses fall into certain traps when cleaning their windows, and the biggest mistake is often skipping key steps, like dusting before washing.
Poor techniques can result in scratches, film buildup, hard water stains, or even mold growth in sills and tracks, and may leave your windows dirty even after cleaning.
Avoiding these common mistakes will save you time, frustration, and money in the long run.
1. Using the Wrong Materials
Common household items like newspapers, paper towels, and old T-shirts may seem convenient, but they can leave behind lint, smudges, or even tiny scratches. Using abrasive materials such as steel wool or scouring pads is especially risky, as they can scratch the glass surface. Additionally, some newspapers contain inks that can transfer onto your glass. Using the wrong tools is a common mistake that can damage your windows and reduce cleaning effectiveness.
How to Avoid: Always opt for microfiber cloths and a rubber squeegee. Microfiber is specially designed to trap dirt and absorb moisture without scratching. Invest in a quality squeegee with a flexible rubber blade to create a smooth, streak-free finish every time.
2. Skipping the Dusting Step
Applying liquid cleaners directly to dusty windows without first removing dust is the biggest mistake in window cleaning. The essential first step is removing dust from the window frame, sill, and glass, as skipping this step turns dirt into mud, causes scratches, and makes cleaning less effective.
How to Avoid: Always start by removing dust using a soft brush, handheld vacuum, or a damp cloth or microfiber cloth before applying any liquid solution. This crucial pre-cleaning step ensures loose dirt, cobwebs, and debris are eliminated, preventing smears and scratches.
3. Using Too Much Cleaning Solution
It might seem logical that cleaner equals better cleaning, but overusing soap or chemicals often backfires. Too much solution can disrupt the surface tension needed for smooth squeegee movement, leading to streaks. Excessive cleaning also leaves residue on the window’s surface, resulting in cloudy streaks that are difficult to remove.
How to Avoid: Use cleaning solutions sparingly. Lightly mist or sponge the cleaner over the glass to evenly cover the window’s surface without flooding it. Remember, less is more.
4. Cleaning Windows in Direct Sunlight
Many people choose sunny days thinking visibility will be better, but the heat causes cleaning fluids to dry too quickly, often before you can properly squeegee or wipe them away. This leads to hard water marks and streaks.
How to Avoid:
Plan your cleaning on cool, overcast days or during early mornings or late afternoons when the sun is not directly on your windows. This gives you time to clean and dry without rapid evaporation.
5. Neglecting Window Tracks and Sills
Windows aren’t just glass. Dirt, leaves, mold, and bugs accumulate in the tracks, frames, and sills, which can cause damage or affect window operation over time. Neglecting these areas can also cause dirt to transfer back to your freshly cleaned glass.
How to Avoid: Use a toothbrush or small brush with soapy water to scrub tracks, frames, and sills. Rinse and dry these areas well. Regular attention keeps windows sliding smoothly and prevents buildup.
6. Only Cleaning the Inside
Cleaning only the interior side of windows leaves the exterior exposed to dirt, dust, pollution, and bird droppings that degrade clarity and appearance. This is especially important in commercial buildings with high foot traffic or pollution.
How to Avoid:
Always clean both sides for a crystal-clear view. Exterior cleaning can be challenging, so consider professional services for hard-to-reach windows or multi-story buildings.
7. Not Drying Properly
Leaving windows to air dry invites water spots and streaks, ruining your hard work. Even tiny droplets can leave noticeable marks once they evaporate.
How to Avoid: Use a dry cloth, such as a microfiber cloth or a squeegee, immediately after cleaning to ensure dry windows. This step helps avoid streaks and prevents residue buildup. Pay close attention to edges and corners where water tends to pool.
Window Cleaning Tips for Better Results
Going beyond the basics, these tips from a cleaning expert can make your window cleaning game stronger and make future jobs easier:
First, it makes sense to avoid cleaning a large area all at once. Focus on smaller sections to ensure even results and prevent streaks, especially when dealing with drying times.
For best results, always use a microfibre cloth when cleaning window glass. Microfibre cloths are highly effective at removing dirt and residue without scratching or leaving streaks, making them superior to traditional cloths.
Remember, window washing is often a quick, surface-level process, while detailed window cleaning involves multiple passes and thorough attention to the window glass for a spotless finish.
When cleaning large or hard-to-reach windows, squeegees are essential tools for achieving streak-free results efficiently.
Finally, pay close attention to your wiping technique. Proper wiping with a microfibre cloth or squeegee is crucial to avoid scratches, streaks, and smudges, ensuring your windows are crystal clear.
1. Use Distilled Water for DIY Solutions
If you’re mixing your cleaning solution, avoid using tap water that contains minerals like calcium and magnesium. These minerals cause water spots and streaks. Use distilled water instead to ensure a spotless, streak-free finish.
2. Try a Vinegar-Based Mix
Vinegar cuts through grease and grime naturally without harsh chemicals. For an eco-friendly, cost-effective cleaner:
- Mix equal parts distilled white vinegar and distilled water.
- Add a drop or two of mild dish soap to tackle tough grime.
- Store it in a spray bottle and shake before use.
3. Clean Windows Regularly
Windows accumulate dirt and pollutants continuously. If you wait too long between cleanings, windows can become dirty and much harder to clean. Regular maintenance helps remove all the dirt before it builds up, preventing windows from becoming dirty and prolonging window life.
Establish a cleaning schedule:
- For homes, aim for seasonal cleanings (spring, summer, fall, and winter).
- For commercial properties, monthly or even bi-weekly cleanings may be necessary depending on location and exposure.
Why Professional Window Cleaning Pays Off for Sparkling ResultsConclusion
Bright, clear windows enhance your living or working environment by letting in natural light, improving appeal, and protecting your investment. While DIY efforts are admirable, they often fall short due to common mistakes that cause streaks, spots, and damage.
Professional window cleaning services provide the expertise, tools, and efficiency to deliver a flawless finish safely and affordably. When it comes to the upkeep of your home or business in Kent or Maidstone, Clearview Servicesstands out as the premier choice for window cleaning in Maidstone and surrounding areas.