
Are you wondering how to care for your windows?
Windows are more than just aesthetic features. Windows help regulate temperature, block out noise, and protect your interior from the elements.
However, often overlooked, windows are constantly exposed to the weather, and without proper attention, they can quickly deteriorate, leading to operational issues that make them difficult to open or close, as well as premature wear and tear that necessitate costly repairs or even full replacements.
The good news is that caring for your windows doesn’t have to be a daunting task. With a little knowledge and a commitment to regular maintenance, you can ensure they continue to perform optimally for years, even decades, saving you significant money on energy costs and future repairs.
This blog post will explain essential window care practices and offer simple, easy-to-understand advice to help you preserve the beauty, functionality, and longevity of your home’s vital connections to the world outside.
What is Window Maintenance?
Proper window maintenance is the foundation for keeping your home comfortable, efficient, and looking its best.
Regular cleaning and timely upkeep not only enhance the appearance of your windows but also play a crucial role in maintaining energy efficiency and peak performance. Clean windows allow more natural light into your home, reduce the build-up of dirt and airborne dust, and help prevent long-term damage that can lead to costly repairs.
By making window maintenance a routine part of your home care, you’ll extend the lifespan of your windows, keep your living spaces brighter, and ensure your windows continue to operate smoothly year after year.
Types of Windows and Their Needs
Every window type has its own set of maintenance requirements, and understanding these differences is key to proper maintenance.
Double-glazed windows, for example, need extra care to preserve their insulating properties and prevent issues like condensation between the panes. Wooden windows require regular cleaning and inspection to guard against rot, warping, and paint deterioration, especially in areas exposed to harsh weather.
UPVC windows are often marketed as virtually maintenance-free, but they still benefit from regular cleaning to keep their frames looking fresh and to prevent the build-up of grime. Timber windows, including those with timber-aluminium frames, demand a combination of gentle cleaning and periodic checks for signs of wear or damage to both the timber and metal components.
By tailoring your cleaning and maintenance routine to the specific needs of your windows, eg, new windows, you’ll ensure they remain in top condition and continue to enhance your home for years to come.
7 Easy Ways to Care for Your Window Care Guide
Here are seven easy cleaning ways to ensure you enjoy smooth and effortless Windows operation for years to come:
1. Inspect Your Windows Regularly
The first and most fundamental step in effective window care is regular inspection. Think of it as a routine health check-up for your windows. Just as you’d spot a small cough before it turns into a serious illness, a regular visual check allows you to catch minor issues before they turn into major, expensive problems.
Aim to inspect your windows at least twice a year. However, if you live in an area with extreme weather conditions or notice any immediate changes, increase the frequency of your checks.
A comprehensive visual and operational check will give you a clear picture of your windows’ health, allowing you to address small issues before they become large ones. When inspecting glass panes, do so in natural daylight but avoid direct sunlight, as glare or reflections can obscure imperfections.
2. Replace Old Weather Stripping
These narrow strips of material, often made from foam, rubber, or vinyl, are installed around the edges of window sashes and frames. Their purpose is to create a tight seal when the window is closed, preventing air and moisture from seeping in or out.
Replacing weather stripping is a relatively inexpensive and straightforward DIY task. First, carefully remove the old, deteriorated stripping. Depending on the type, it might peel off, pull out of a channel, or require gentle prying. Clean the surface thoroughly to remove any old adhesive residue or dirt.
Measure the length of the old stripping or the length of the window frame where it will be applied, and cut the new weather stripping to size. Apply the new stripping firmly and evenly, ensuring a continuous seal.
3. Look For Moisture Build-Up
Moisture build-up on or within your windows should never be ignored. The most common sign of this is fogging or condensation between the panes of a double-glazed (or insulated) window. Not only does this obscure your view, but it also compromises the insulating properties of the window. Condensation forms when the temperature of the glass drops below the dew point, causing water vapour in the air to condense into droplets on the window.
Beyond internal fogging, look for other signs of moisture. Are there water stains on your window sills or frames? Is the paint bubbling or peeling on wooden frames? Do you see dark spots that might indicate mold or mildew growth on the frame, sill, or even adjacent walls?
These could mean that water is entering your home through gaps in the window frame, deteriorated caulk, or improperly installed flashing. Excess water vapour in the air can also lead to condensation, especially when it comes into contact with cooler window surfaces. Unchecked moisture can lead to serious structural damage, rot, and unhealthy indoor air quality due to mold spores.
For minor condensation on the inside glass surface, try improving ventilation. For external moisture ingress or internal fogging, a professional assessment might be needed to pinpoint the exact source of the leak, whether it’s a failed seal, compromised caulk, or an issue with the window’s flashing, and recommend the appropriate repair.
4. Seal Any Gaps and Cracks
After checking your weather stripping and looking for moisture issues, the next step is to identify and seal any visible gaps or cracks around your window frames. These seemingly small imperfections can have a large impact on your home’s building.
Gaps and cracks typically appear where the window frame meets the wall or where different parts of the frame join together. The primary consequence of unsealed gaps and cracks is air leakage.
Once identified, sealing these gaps is a relatively easy and cost-effective DIY project using caulk. Before applying new caulk, remove any old, loose, or cracked caulk with a utility knife or caulk removal tool. Clean the surface thoroughly to ensure good adhesion; it should be dry, clean, and free of grease or debris.
Choose an exterior-grade, paintable caulk that is flexible and weather-resistant, such as silicone or acrylic latex caulk with silicone. Apply a steady, even bead of caulk along the crack or gap, ensuring full coverage. Smooth the caulk with a wet finger or a caulking tool for a neat finish. For larger gaps, you might need to use a backer rod before applying caulk.
5. Don’t Forget the Screens and Sills
While the glass and frames often get the most attention, the window screens and sills are equally important components that require regular care.
Your screens are your home’s first line of defense against insects while still allowing fresh air to circulate. Over time, screens can accumulate a surprising amount of dust, pollen, pet hair, and environmental grime, which can restrict airflow and make your windows look dirty even if the glass is clean.
More importantly, screens can develop tears or holes, compromising their ability to keep out pests. Cleaning screens is simple: gently remove them from the window frame if possible. Lay them flat on a clean surface or lean them against a wall.
Use a soft brush or a vacuum cleaner with a brush attachment to remove loose dirt. Then, wash them with a mild detergent solution (like dish soap and water) and a soft brush or sponge. Rinse thoroughly and allow them to dry completely before reinstalling. For best results, finish by wiping the screens with a dry cloth to remove any remaining moisture and prevent streaks.
The window sill, both inside and outside, bears the brunt of spills, condensation, and weather exposure. The exterior sill, often called the “stool” or “sub-sill,” is designed to shed water away from your home. However, it can collect dirt, leaves, and other debris, especially in its drainage channels (weep holes).
If these holes become clogged, water can pool on the sill, potentially seeping into the window frame or wall, leading to rot, mold, and structural damage. Regularly clean both interior and exterior sills. For the interior sill, a quick wipe-down with a damp cloth is usually sufficient. For the exterior sill, use a brush or vacuum to clear away loose debris. After cleaning, make sure you are wiping the sill thoroughly to ensure it is dry and free of residue.
6. Clean and Lubricate the Window Tracks
One of the most common complaints about windows is when they become difficult to open or close, sticking, grinding, or feeling stiff. Often, the culprit isn’t a problem with the window mechanism itself, but rather with dirty and unlubricated tracks.
Regular cleaning and lubrication of your window tracks can improve their operation and extend their lifespan. This is a task that should be done at least once a year, or more frequently if your windows are exposed to a lot of dust or outdoor elements.
Once your window tracks are cleaned, apply a silicone-based spray lubricant. Avoid petroleum-based lubricants (like WD-40) as they can attract more dirt and grime over time, potentially damaging vinyl or plastic components.
Open and close the window several times to distribute the lubricant evenly and ensure smooth operation. In addition to the tracks, be sure to lubricate the locking points to keep the window locking mechanism working smoothly and securely. This step not only makes your windows a pleasure to use but also reduces wear and tear on the moving parts, preventing costly repairs down the line.
7. When to Call the Pros: DIY vs. Professional Cleaning
There is a clear line between tasks that are suitable for the average homeowner and those that are best left to professionals. While regular inspections, minor cleaning, and basic sealing are definitely within the DIY, certain situations warrant calling in the experts.
When you have multi-story homes, stubborn hard water stains, post-renovation cleanups, extensive mold or rot, and a large number of windows, professional window cleaners are best at handling this.
They have the right equipment (ladders, scaffolding, water-fed poles) and, more importantly, the training and insurance to perform these tasks safely. Attempting to do this yourself could lead to serious injury or property damage.
Also, for consistent, year-round window health, scheduling regular professional cleanings and inspections can be a worthwhile investment, especially if you lead a busy life or prefer not to tackle the task yourself.
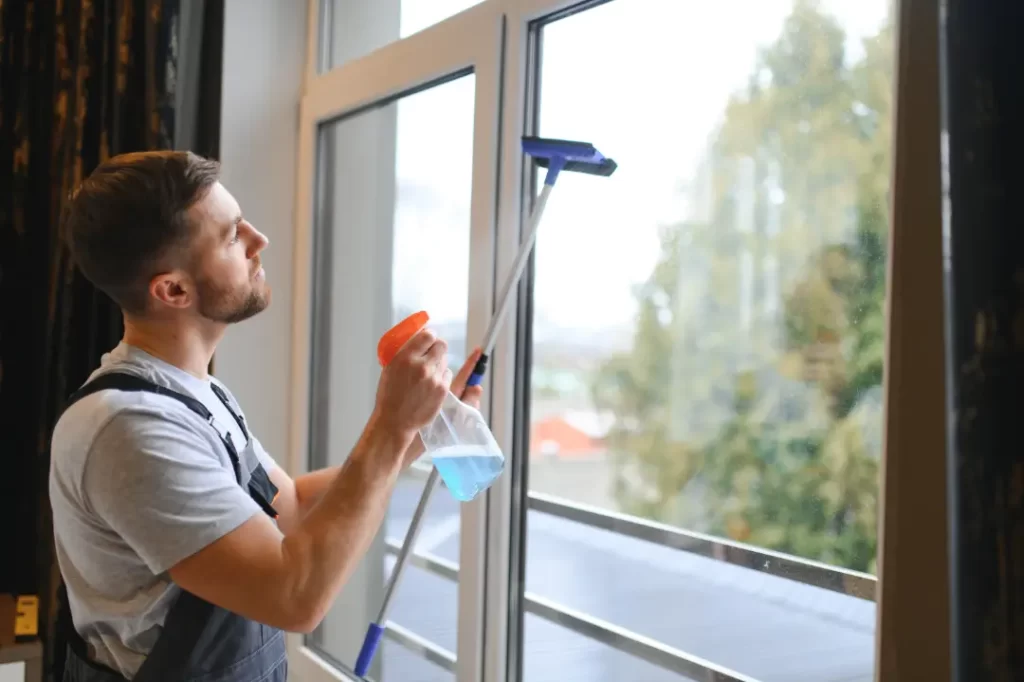
Choosing the Right Cleaning Products
Selecting the right cleaning products is essential for keeping your windows spotless and protecting their surfaces.
For most window frames and glass surfaces, a mild detergent such as washing-up liquid mixed with warm, soapy water is effective for everyday cleaning. For more stubborn stains or water marks, a dedicated glass cleaner can help restore clarity without damaging the glass.
Always use a soft cloth or a lint-free cloth to avoid scratching the glass or leaving lint behind. Avoid abrasive cleaners, steam cleaners, and pressure washers, as these can damage both the glass and the window frames.
For tougher marks, a damp cloth and a gentle cleaning solution, such as a cleaning agent, can be used, but steer clear of steel wool or any abrasive materials.
By choosing the right cleaning products and tools, you’ll keep your windows and frames looking their best while ensuring their longevity.
Troubleshooting Common Window Maintenance Issues
Even with regular cleaning and maintenance, windows can sometimes develop issues such as condensation, mould growth, or stubborn stains.
Condensation is often a sign of poor ventilation or temperature differences and can be minimized by using trickle vents and maintaining consistent indoor temperatures.
Mould growth typically occurs in damp environments, so regular cleaning and prompt attention to any leaks or water damage are essential to prevent it from taking hold. Stubborn stains on glass or frames can usually be removed with a soft cloth and a gentle cleaning agent, but persistent marks may require extra care.
To ensure smooth operation, don’t forget to lubricate hinges, locking mechanisms, and other moving parts as part of your regular maintenance routine.
By addressing these common issues early, you’ll keep your windows functioning properly and looking great while avoiding more serious problems down the line.
Conclusion
Proactive and regular window care is an investment that yields tangible benefits in the form of fewer costly repairs and a healthier, more comfortable indoor environment.
However, while many essential window care tasks are well within the capabilities of the homeowner, knowing when to call in the professionals is equally important.
For challenging high-rise windows, stubborn hard water stains, post-renovation cleanups, or complex issues like failed window seals, professional expertise ensures safety, efficiency, and superior results.
As trusted experts in window cleaning in Kent, Clearview Services offers the peace of mind that comes with safety and experience in window cleaning.
Book an appointment today to enjoy beautiful, and well functional windows all year-round.